Scotty, We Need More Power!!!
- ourtinycamper
- Oct 30, 2021
- 3 min read
Updated: Apr 4, 2022
We boondock a lot, and for us, power is a critical requirement. The batteries that come on the Braxton Creek Free Solo leave something to be desired (single 50 Amp Lead Flooded Battery). We tried moving to twin Lead 50 Amp, but it was difficult to charge and wasn't getting the job done. Let's face it, they are heavy, horrible on charging and energy retention, just not efficient.
Luckily there are a lot of options out there. For us, the best choice was twin LiFePO4 Deep Cycle Battery 12V 100Ah. Wired in parallel this keeps us at 12 volt, while giving us 200 amps of energy. This gives us the ability to quickly charge from shore power, from the 7 pin on the TV (Tow Vehicle), and also maintain from our solar setup (See Link on our solar setup here).
Changing batteries on the Braxton Creek isn't difficult, but takes attention to detail. You need to ensure all power is cut to the batteries, and ensure you are connecting things correctly as you go.
New Batteries versus the old. First, yes, lithium aren't cheap. But when you look at the durability, recharge ability, and over-all life, versus the Lead flooded, the value is there, and it's worth it.
Now, before we go to deep here, you need to understand that charging this large of a power bank has it's own challenges. Your TV (Tow Vehicle) isn't going to give this a 100% Charge with a standard configuration. To overcome this we plan to add a DC to DC battery charger at a later stage.
For more on this issue, here is a great write up by Renogy: https://www.renogy.com/blog/effectively-charge-your-rv-batteries-while-driving/
All in this project will cost you about $850. There is some recovery costs in that you can sell the old battery(s) and battery case. How much $$ you can recover will depend on your area.
Here is the battery we purchased. As I said above, we are running two parallel to maintain our 12 volts, and double our Ah storage.

When it comes to life and durability, it is obvious looking at the below. Reduced tongue weight, Better Power Load and cycles, and life of the battery is 3 times a Lead Acid Battery.

From the aspect of performance, lithium charges faster, has far better capacity, and has a far superior discharge rate.

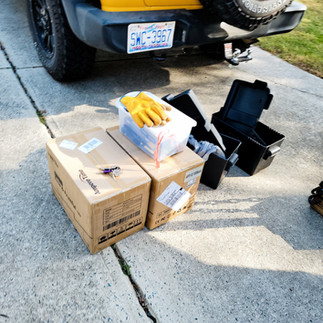
Step 1. Out with the old.
The first thing we did was to get the tanks our of the way so we could easily navigate the batteries and the storage boxes. Make sure you disconnect the Ground, and then the Main / Hot from the camper. If you disconnect the ground first then you don't risk issues if the Positive (+) touches anything. We have a disconnect switch for our Positive (+) so for us it is as simple as turning a switch. If you don't have one, I highly recommend ordering one and installing when you upgrade the battery(s). It will prevent your camper from leaching your power while not being used. It simply installs between the battery and the postive line going to the camper. Here is the switch we used:
GOGONFLY Battery Switch 12-48V Battery Power Cut Master Switch Disconnect Isolator Cut Off Switch for Marine Boat Car Truck Camper RV Trailer Vehicles: https://smile.amazon.com/gp/product/B0981PHXLK/
Now you can remove the battery, and remove the battery box.


Now let's get the new batteries installed!!!
In With The New:
Like I said earlier, we went with two batteries, so we are installing two 1oo Ah in parallel, so the wiring looks like this:

Now that we have the old equipment out, we can install the new battery boxes and batteries. 1) Boxes first, 2) then batteries, 3)install your jumper wires for the batteries (parallel), 4) connect your ground, 5) finally, connect your positive.
For the wiring I have found it is WAY CHEAPER to pick up a set of Jumper cables and cut off the clamps and then use what I need, and it is color coded correctly! In this instance I went with 4 AWG to ensure I had the cable strength I needed. That's 40 feet of 4 AWG for less than $20...
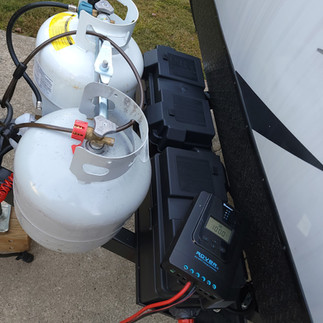
At this point I connected our Renogy Controller to see what the storage looked like. I was really surprised to see the batteries at 95% even after sitting for who knows how long at Amazon, and then sitting in my garage for over a month.


Now just put on your covers and lock them down!
I hope you find this useful. Check out our other posts for other modifications we have done.
Inventory for this mod can be found below.

LiFePO4 Deep Cycle Battery 12V 100Ah with Built-in BMS

JEGS 10261 Automotive/Marine Battery Box

EPAuto 4 Gauge x 20 Ft 500A Heavy Duty Booster Jumper Cables
That's 40 total feet of 4 AWG cable for less than $20.00.
Comentários